08 November 2022

Terraform module

What is Terraform module & how to create one

A Terraform module is a collection of reusable Terraform configurations that represents a set of resources or infrastructure components that can be managed together as a single unit.

Terraform modules typically consist of:

Input Variables: Parameters that allow users of the module to provide specific values when they use the module. They serve as a way to customize the behavior of the module for different use cases.
Resource Definitions: A module defines the resources it creates or manages, allowing you to encapsulate complex infrastructure configurations into reusable components.
Output Variables: Output variables are used to expose specific information about the resources created by the module.
Local Values (Optional): Local values are used to define intermediate values or calculations within the module's configuration.
Data Sources (Optional): Data sources enable you to retrieve information about existing resources or data from external sources.
Provisioners (Optional): Provisioners are used to execute scripts or commands on resources after they are created or updated. While they can be used within a module, it is generally recommended to avoid using provisioners unless there is no other alternative.
Submodules (Optional): A Terraform module can also include other submodules, allowing for modular composition and reuse. Submodules are nested modules within the main module, which can be used to create a more granular and flexible component structure.

To create a Terraform module, follow these steps:

Step 1: Create a Directory
Create a new directory that will contain your module. Give it a meaningful name that represents the functionality of the module.

Step 2: Write Configuration Files
Inside the module directory, create one or more Terraform configuration files with the .tf extension. These files will define the resources and configurations that the module provides. The configuration files should include input variables, resource definitions, and output variables.

Step 3: Define Input Variables
Declare input variables in the module configuration files to allow users of the module to provide values specific to their use case. Use the declared input variables within the resource definitions and other parts of the module's configuration to make it configurable.

Step 4: Define Output Variables
Declare output variables to expose specific information about the created resources or any other relevant data.

Step 5: Publish the Module
To share the module with others, you can publish it to Terraform Registry (public or private) or a version control repository accessible to others.

Create a simple example of a Terraform module for an EC2 instance:

Directory structure for the module:

$ mkdir -p modules/aws-ec2-instance
$ cd modules/aws-ec2-instance/
$ touch main.tf variables.tf outputs.tf
$ cd ..
$ tree
.
└── aws-ec2-instance
    ├── main.tf
    ├── outputs.tf
    └── variables.tf

1 directory, 3 files

Now, let's define the contents of each file:

main.tf

resource "aws_instance" "example_instance" {
  ami           = var.ami
  instance_type = var.instance_type
  subnet_id     = var.subnet_id
  security_groups = [var.security_group_id]
}

variables.tf

variable "ami" {
  description = "The ID of the AMI to use for the EC2 instance."
}

variable "instance_type" {
  description = "The type of EC2 instance to create."
}

variable "subnet_id" {
  description = "The ID of the subnet where the EC2 instance will be launched."
}

variable "security_group_id" {
  description = "The ID of the security group to attach to the EC2 instance."
}

outputs.tf

output "instance_id" {
  description = "The ID of the created EC2 instance."
  value       = aws_instance.example_instance.id
}

output "public_ip" {
  description = "The public IP address of the EC2 instance."
  value       = aws_instance.example_instance.public_ip
}

With this module, you can create an EC2 instance by calling it in your root Terraform configuration:

provider "aws" {
  region = "us-west-2"
}

module "ec2_instance" {
  source = "./path/to/module"  # Local path to the module directory

  ami                = "ami-0c55b159cbfafe1f0"
  instance_type      = "t2.micro"
  subnet_id          = "subnet-0123456789abcdef0"
  security_group_id  = "sg-0123456789abcdef0"
}

output "module_instance_id" {
  value = module.ec2_instance.instance_id
}

output "module_public_ip" {
  value = module.ec2_instance.public_ip
}

You can store Terraform modules in various locations, depending on your use case and organizational preferences. Here are some common options for storing modules:

  • Local paths
  • Terraform Registry
  • Git Repositories

Local paths

You can store modules directly in your Terraform project's directory structure, or in a subdirectory.
A local path must begin with either ./ or ../ to indicate that a local path.

module "instance" {
  source = "../modules/aws-ec2-instance"
}

Terraform Registry
The Terraform Registry is a public repository maintained by HashiCorp that contains many officially supported and community-contributed modules. You can publish your modules to the Terraform Registry or use existing modules directly from it.
You can also use a private registry, either via the built-in feature from Terraform Cloud or Terraform Enterprise.
Terraform Registry can be referenced using a registry source address of the form
 < NAMESPACE >/< NAME >/< PROVIDER > or 
terraform-<PROVIDER>-<NAME>

module "instance" {
  source = "hashicorp/ec2-instance/aws"
  version = "0.1.0"
}

Git Repositories
(https://github.com/punitporwal07/terraform-aws-ec2) 

For larger projects or when you want to share modules across multiple projects or teams, you can store modules in separate Git repositories.
Each module will have its own repository, and you can refer to it using a Git URL.

Publishing a module on Git Repository
 refer -  https://developer.hashicorp.com/terraform/registry/modules/publish 
once module files are available in github, publish it from - https://registry.terraform.io/ 

calling module in your code
module "ec2" {
  source = "punitporwal07/terraform-aws-ec2"
  version = "1.0.0" # git tag
}

or
module "ec2" {
  source = "git@github.com:aws-modules/terraform-aws-ec2.git"
  version = "1.0.0" # git tag
}
once published can be seen as below -


13 January 2021

Terraform Cheatsheet

To implement infrastructure as code with different cloud providers, terraform comes with commands that take subcommands such as "apply" or "plan" to do its job. Below is the complete list of subcommands

Terraform workspaces in more detail -
Terraform workspaces are a feature that allows you to manage multiple distinct sets of Terraform state files within a single Terraform configuration.

Workspaces are useful when you need to maintain multiple copies of the same infrastructure for different purposes, such as development, testing, staging, and production, without duplicating your configuration files.

When you work with Terraform workspaces, each workspace has its own state file, which means that you can have different resource instances or configurations for each workspace.

This separation helps prevent accidental changes to the wrong environments and makes it easier to manage complex deployments.

Terraform starts with a single, default workspace named `default` that you cannot delete. If you have not created a new workspace, you are using the default workspace in your Terraform working directory.

Few commands to work on workspaces -

List workspaces:
$ terraform workspace list  
 * default
Create a workspace:
$ terraform workspace new dev
 Created and switched to workspace "dev"!
You're now on a new, empty workspace. Workspaces isolate their state,
so if you run "terraform plan" Terraform will not see any existing state
for this configuration.

$ terraform workspace new staging
 Created and switched to workspace "staging"!

You're now on a new, empty workspace. Workspaces isolate their state,
so if you run "terraform plan" Terraform will not see any existing state
for this configuration.
To check the current workspace, use the `terraform workspace show` command.

$ terraform workspace show
staging
Select a Workspace:
To switch b/w workspaces

$ terraform workspace list
  default
  dev
* staging 

$ terraform workspace select dev
 Switched to workspace "dev".

$ terraform workspace show
 dev

Destroy Resources per workspace:
$ terraform workspace delete dev


30 April 2020

Deploying IaC using Terraform

TERRAFORM is used to automate infrastructure deployment across multiple providers in both public and private clouds & even on-prem. Provisioning of infrastructure through 'software' to achieve 'consistent' and 'predictable' environments is Infrastructure as code, it maintains a copy of the Local/Remote state.

                In my view IaC is replacement of SOPs which is automated on top of it.

core concepts to achieve this:
  • Defined in Code: Iac should be defined in code whether in the form of JSON YAML or HCL.
  • Stored in source control: the code should be stored somewhere in the version source control repository like GitHub.
  • Declarative & Imperative: In imperative, I am going to tell the software each and everything which it needs to do the job. In declarative software already have some sort of Idea or a predefined routine, what it is going to do with taking some references. so terraform is an example of a declarative approach to deploy IaC
  • Idempotent & consistency: once a job is done, and if again I get a request to do the same job it is idempotent behavior of terraform to not repeat the steps done while fulfilling this job, instead will say there is no change in configuration and current requirement is same as the desired one so no changes needs to be made. otherwise in a non-idempotent world each time this job comes it gonna repeat the same steps again and again to fulfil the requirement which is already in place.
  • Push & pull: terraform works on the principle of push mechanism where it pushes the configuration to its target.
The key benefit here is - everything is documented in code, which makes you understand your infrastructure in more detail.
key terraform components
AWS-Terraform beyond the basics - Terraform-beyond-the-basics-with-aws

In this exercise, I am trying to demonstrate how you can quickly deploy a t2.micro instance of amazon Linux without login into the aws console by just writing a terraform plan
to begin with, you need to fulfill a prerequisite:
  • terraform client to run terraform commands                              
  • IAM user with AWS CLI access & sufficient policies attached to it
    like  -  AmazonEC2FullAccess
            -  
      IAMFullAccess
Note: at the time of writing this article I have used terraform version 0.8.5 so you may see some resource deprecation.

Install terraform client
$ wget https://releases.hashicorp.com/terraform/0.13.4/terraform_0.13.4_linux_amd64.zip
$ unzip terraform_0.13.4_linux_amd64.zip //updated version $ sudo mv terraform /usr/sbin/

To create a terraform config file with .tf as an extension, here are the key blocks that terraform tends to use to define IaC

#PROVIDER - AWS, google, kuberbetes like providers can be declared here            - on-premsise [OpenStack, VMWare vSphere, CloudStack]
#VARIABLES - input variables can be declared here
#DATA - data from provider collected here in form of data source
#RESOURCE - feeding info about resources from provider here
#OUTPUT - data is outputted when apply is called


Defining variables in terraform can be achieved in multiple ways, you can either create an external file with *.tfvars extension or can create a variables.tf or can include it in your main.tf file to persist variable values.

In this exercise, I will attempt to deploy a "t2.micro" instance on Amazon EC with Nginx up and running.
in the end, your terraform configuration files structure may look like where *.tfplan & *.tfstate are the key files for your IaC.

Creating a terraform configuration file will include following blocks

#VARIABLES

First, we are going to define a set of variables here, that are used during the configuration. I have defined keypairs so that we can SSH to our AWS instance, with a default region where my instance will be deployed

# VARIABLES
variable "prefix" {
  description = "servername prefix"
  default     = "ec2-by-tf"
}


#PROVIDER

In the provider file we are defining our providers, and feeding information about our key details defined in our variable section with syntax var.variableName

# PROVIDER
provider "aws" {
  region  = "eu-west-2"
  profile = "dev"
}


#DATA

In the datasource block, we are pulling data from the provider, in this exercise we are using amazon as a provider and using Linux AMI for our EC2 instance
# DATA
data "aws_ami" "aws-linux" {
most_recent = true owners = ["amazon"] filter { name = "name" values = ["amzn-ami-hvm*"] } filter { name = "root-device-type" values = ["ebs"] } filter { name = "virtualization-type" values = ["hvm"] } }

#RESOURCE

In this block we can define more than one resource, But, here I am using my existing Security Group, keyPair & subnet. 

#RESOURCE
resource "aws_instance" "web" { ami = "ami-078a289ddf4b09ae0" instance_type = "t2.micro" count = 1 vpc_security_group_ids = ["sg-0239c396271cffcc3"] key_name = "my-london-kp" subnet_id = "subnet-00b9ff577be292c27" associate_public_ip_address = "true" tags = { Name = "${var.prefix}${count.index}" } }


#OUTPUT

this block will help to give you the output of your configuration, here it will give Public IP & EC2 Instance ID

#OUTPUT
output "instance_ip" { value = "${aws_instance.web.*.public_ip}" description = "PublicIP address details" } output "instance_id" { value = "${aws_instance.web.*.id}" description = "ID of EC2 Instance" }

#END


Update the value for the following as per your requirement -
AMI ID
KeyPair
Security Group ID
Subnet ID

now to deploy the above configuration, terraform deployment process follows a cycle:

Initialization > Planning > Application > destruction


$ terraform init


this initializes the terraform configuration and checks for provider modules/plugins if its already not available and downloads the modules as shown below


$ terraform fmt // this will check the formatting of all the config files
$ terraform validate // this will further validate your config
$ terraform plan -out ami.tfplan // outing the plan will help to reuse it


it looks for the configuration file in pwd and loads all variables if found in the variable file, and stores out the plan as shown below


$ terraform apply "ami.tfplan" --auto-approve


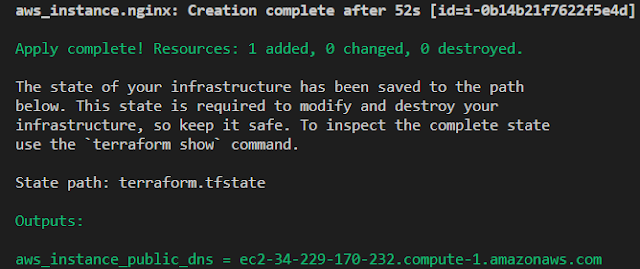
it performs the configuration you created as code, applies it to the provider and does the magic. At the time of applying tfplan if anything config your terraform doesn't like and gives you an error, you need to correct it again and replan the ami.tfplan

Test your configuration by hitting the URL generated by outputs.tf file


Validate from your aws console you will see this


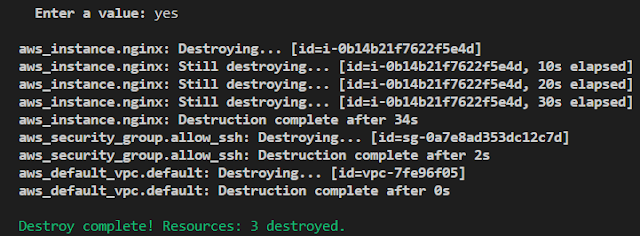
now if you don't want the configs to be active and charge you the money you can destroy it


$ terraform destroy --auto-approve


lastly from your config folder you can destroy the config you applied and it will destroy everything corresponding to your config

13 August 2022

Provision of EKS cluster via terraform

Amazon service for Kubernetes a.k.a Amazon EKS makes it easy to deploy, manage,
and scale containerized applications using Kubernetes on AWS.
Amazon EKS runs the Kubernetes management infrastructure across multiple AWS Availability Zones, automatically detects and replaces unhealthy control plane nodes, and provides on-demand upgrades and patching when required.
You simply provision worker nodes and connect them to the provided Amazon EKS endpoint.

The architecture includes the following resources:

EKS Cluster - AWS managed Kubernetes control plane node + EC2-based worker nodes.
AutoScaling Group
Associated VPC, Internet Gateway, Security Groups, and Subnets
Associated IAM Roles and Policies

Once the cluster setup is complete install kubectl in your bastion host to control your EKS cluster.

# Install kubectl $ curl -LO https://storage.googleapis.com/kubernetes-release/release/v1.23.6/bin/linux/amd64/kubectl
 
 $ chmod +x kubectl && 
sudo mv kubectl /usr/bin/kubectl

In this article, I will describe how my code containing Jenkinsfile & Terraform-code is housed on a local machine from which my code will be pushed to my git repository.

I then created a Jenkins pipeline job to pull the code from git and deploy it on AWS. Upon successful execution of the Terraform code, it will deploy an Amazon-managed EKS cluster with two worker nodes of Amazon EC2. (1 on-demand instance of the t2.micro size and 1 spot instance of the t2.medium size)


A Jenkinsfile for this pipeline job can be found here replicate it as per your requirement and replace the repository name where needed 

Terraform-code to provision the EKS cluster can be found here
https://github.com/punitporwal07/git-jenkins-tf-aws/blob/main/eks-by-tf-on-aws.tf 

once the code is ready push it to your git repository as below -

# Pushing code from local to github repository
$ git init
$ git add . $ git commit -m "sending Jenkinsfile & terraform code" $ git push origin master


Setup Jenkins Pipeline
Login to your Jenkins dashboard and create a Pipeline Job or a readymade config.xml for this job can be found here copy it and push it under /var/lib/jenkins/jobs/ directory and restart Jenkins, this will add a new pipeline job in your Jenkins.

If you are using a bastion host to test this journey make sure you have AWS profile set for the user which has all the required role attached to it.

my profile for this job looks like the below -

# cat ~/.aws/credentials [dev]
aws_access_key_id = AKIAUJSAMPLEWNHXOU aws_secret_access_key = EIAjod83jeE8fzhx1samplerjrzj5NrGuNUT6 region = eu-west-2

Policies attached to my user to provision this EKS cluster -


Plus an inline policy for EKS-administrator access

{ "Version": "2012-10-17", "Statement": [ { "Sid": "eksadministrator", "Effect": "Allow", "Action": "eks:*", "Resource": "*" } ] }

Now you have all the required things in place to run the pipeline job from Jenkins which will pick the code from GitHub and deploy an aws-managed EKS cluster on AWS provisioned by Terraform code.

A successful job will look like the below upon completion.


Finally, the EKS cluster is created now, which can be verified from the AWS console


Accessing  your cluster

1. from the Bastion host by doing the following -


 # export necessary varibles as below & set cluster context

 $ export KUBECONFIG=$LOCATIONofKUBECONFIG/kubeconfig_myEKSCluster
 $ export AWS_DEFAULT_REGION=eu-west-2
 $ export AWS_DEFAULT_PROFILE=dev

 $ aws eks update-kubeconfig --name myEKSCluster --region=eu-west-2
 Added new context arn:aws:eks:eu-west-2:295XXXX62576:cluster/myEKSCluster to $PWD/kubeconfig_myEKSCluster


2. Alternatively, you can view cluster resources from aws-console however, you might see the following error when you access them.


(OPTIONAL, not every user will see this message it will varies from roles to roles) 
EKS manages user and role permissions through a ConfigMap called aws-auth that resides in the kube-system namespace. So despite being logged in with an AWS user with full administrator access to all services, EKS will still limit your access in the console as it can't find the user or role in its authentication configuration.
which can be fixed by updating the Roles and Users of  aws-auth configmap of your EKS-cluster 


 # from your bastion host 
 
 $ kubectl edit configmap aws-auth -n kube-system

 apiVersion: v1
 data:
   mapAccounts: |
     []
   mapRoles: |
     - rolearn: arn:aws:iam::2951XXXX2576:role/TF-EKS-Cluster-Role
       username: punit
       groups:
         - system:masters
         - system:bootstrappers
         - system:nodes
   mapUsers: |
     - userarn: arn:aws:iam::2951XXXX2576:user/punit
       username: punit
       groups:
       - system:masters


your TF-EKS-Cluster-Role should have the following policies attached to it


from your custom user in this case punit, access the console with this user as we have granted permission to this user to view the EKS-cluster resources.


Known Issues -

Error while running pipeline stage when it tries to clone the repository to the workspace by running usual 'sh git clone' command and gives following error
generate pipeline script by navigating to

Pipeline Syntax > Sample Step as git:Git > give your repository details > Generate Pipeline Script

it will generate a command for you to use in the pipeline state -
Ex -
git branch: 'main', credentialsId: 'fbd18e1b-sample-43cd-805b-16e480a8c273', url: 'https://github.com/punitporwal07/git-jenkins-tf-aws-destroy.git'

add it in your pipeline stage and rerun it.

20 September 2018

Deploying AWS resources with CloudFormation

CloudFormation is an infrastructure as a code provider in aws it is one of the major offerings from AWS, that helps you to set up a prototype of your managing resources. So that you worry less in setting up those resources every time, instead you create a template defining all your required resources and let aws-cloudformation do the provisioning and configuring of your defined resources like other famous IaC tool called Terraform. It works in an incremental fashion, which means it always looks for what has changed since your last upload and only performs updates on things that have changed.
There are pre-defined templates available in AWS which you can use and customize according to your requirement.

AWS CloudFormation Template usually written in YAML or JSON format

 
 Its syntax includes

 AWSTemplateFormatVersion [usually 2010-09-09 as latest]
 Description [basic idea about your template]
 Metadata    [label your parameters]
 Parameters  [data about parameters]
 Mappings
 Resources  [define all your required aws resources here]
Condtions Output [can be your end result]
  A sample json resource for S3 may look like

{

    "Resources": {

        "democf": {

            "Type": "AWS::S3::Bucket",

            "Properties": {}

        }

    }

}
 

the moment you create a stack, it will store your stack into S3 generating a URL for it

ex:


 https://s3.ap-south-1.amazonaws.com/cf-templates-194b45c-ap-south-1/202118-demox5dr


The best sample template to start with cloudFormation is the LAMP stack (Linux Apache Mysql Php)

Navigate to: services > cloudFormation > Create Stack > use a sample template > LAMP stack

at this stage, you do have an option to customize your stack, choose View in Designer to customize it and edit the json/yaml as per requirement and create a stack by clicking a small button 
a glimpse from designer

once you create the task it will show the status in events

Verification
  • You should be able to see all the four resources in aws-gui
  • navigate to EC2 dashboard you will see a new instance created using the above stack
  • hit public IP of EC2-Linux instance you will be able to see a PHP page hosted by Apache
  • connect to EC2 and test your Mysql by running the below command.


 $ mysql -h localhost -P 3306 -u dbuser -p dbpass
   // if all goes well you should be able to connect to your sql db


and that's it. This is how you can start with your first cloudFormation template in AWS.

24 February 2017

DevOps

Set of practices that emphasize the collaboration and communication of both software DEVelopers and IT OPerationprofessionals while automating the process of software delivery and infrastructure changes, which aims at establishing a culture and environment where building, testing, and releasing software can happen rapidlyfrequently, and more reliably.

"which ultimately means building digital pipelines that take code from a developer’s laptop all the way to revenue-generating prod awesomeness"


some myths that should be addressed before deep dive into DevOps

Myth - DevOps replace Agile
DevOps is the next step of agile
DevOps principles and practices are compatible with agile
agile is an enabler of DevOps
not a replacement, but is a logical continuation
a 'deployable piece' of code rather than a 'potentially ship-able piece' of code after each sprint

Myth - it "All Dev & No Ops"
the nature of IT Ops work may change.
ops collaborate far earlier in the software life cycle with Devs.
Devs continue to work with Ops long after the code is in prod.

Myth - DevOps is just automation
it requires automation for sure.. But that's not all.. it's much beyond that.

Myth - DevOps is a Tool/Product
it's rather a combination of tools
we don't buy DevOps.. instead, we do DevOps

In an organisation where everything gets automated for seamless delivery the generic logical flow will be:
  1. Developers develop the code and the source code is managed by a Version Control System tool like Gitthen developers send this code to the git repository and any changes made in the code is committed to this repository.
  2. Then Jenkins pull this code from the repository using the git plugin and build it using tools like Ant or Maven.
  3. Configuration management tool like Ansible/Puppet deploys this code & provision testing env. and then Jenkins releases this code on the test environment on which testing is done using tools like selenium
  4. Once the code is tested, pipelines configured using Jenkins send it for deployment on the production server (even production server is provisioned & maintained by tools like Ansible/Puppet)
  5. After deployment, it is continuously monitored by tools like Nagios.
  6. Docker containers provide a quick environment to test the build features. 


here are some useful articles with respect to DevOps