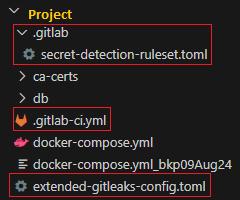
27 October 2023

Testing Ingress in Azure Kubernetes Service

If you are familiar with the Kubernetes ecosystem, you know we can use NGINX as an ingress controller to expose Kubernetes services on an static external/Public IP address. Azure Kubernetes Services provides the solution. In AKS, you have the option of installing your NGINX ingress controller(using helm) on an internal network. This ensures that your resources are only accessible on your internal network and that they can be accessed through an Express Route or a VPN connection.

The process of setting up Ingress in AKS can be summarized in following steps:%3CmxGraphModel%3E%3Croot%3E%3CmxCell%20id%3D%220%22%2F%3E%3CmxCell%20id%3D%221%22%20parent%3D%220%22%2F%3E%3CmxCell%20id%3D%222%22%20value%3D%22%22%20style%3D%22sketch%3D0%3Bhtml%3D1%3Bdashed%3D0%3Bwhitespace%3Dwrap%3BfillColor%3D%232875E2%3BstrokeColor%3D%23ffffff%3Bpoints%3D%5B%5B0.005%2C0.63%2C0%5D%2C%5B0.1%2C0.2%2C0%5D%2C%5B0.9%2C0.2%2C0%5D%2C%5B0.5%2C0%2C0%5D%2C%5B0.995%2C0.63%2C0%5D%2C%5B0.72%2C0.99%2C0%5D%2C%5B0.5%2C1%2C0%5D%2C%5B0.28%2C0.99%2C0%5D%5D%3BverticalLabelPosition%3Dbottom%3Balign%3Dcenter%3BverticalAlign%3Dtop%3Bshape%3Dmxgraph.kubernetes.icon%3BprIcon%3Ding%3Bdirection%3Deast%3B%22%20vertex%3D%221%22%20parent%3D%221%22%3E%3CmxGeometry%20x%3D%221260%22%20y%3D%22930%22%20width%3D%2231%22%20height%3D%2230.53%22%20as%3D%22geometry%22%2F%3E%3C%2FmxCell%3E%3C%2Froot%3E%3C%2FmxGraphModel%3E%3CmxGraphModel%3E%3Croot%3E%3CmxCell%20id%3D%220%22%2F%3E%3CmxCell%20id%3D%221%22%20parent%3D%220%22%2F%3E%3CmxCell%20id%3D%222%22%20value%3D%22%22%20style%3D%22sketch%3D0%3Bhtml%3D1%3Bdashed%3D0%3Bwhitespace%3Dwrap%3BfillColor%3D%232875E2%3BstrokeColor%3D%23ffffff%3Bpoints%3D%5B%5B0.005%2C0.63%2C0%5D%2C%5B0.1%2C0.2%2C0%5D%2C%5B0.9%2C0.2%2C0%5D%2C%5B0.5%2C0%2C0%5D%2C%5B0.995%2C0.63%2C0%5D%2C%5B0.72%2C0.99%2C0%5D%2C%5B0.5%2C1%2C0%5D%2C%5B0.28%2C0.99%2C0%5D%5D%3BverticalLabelPosition%3Dbottom%3Balign%3Dcenter%3BverticalAlign%3Dtop%3Bshape%3Dmxgraph.kubernetes.icon%3BprIcon%3Ding%3Bdirection%3Deast%3B%22%20vertex%3D%221%22%20parent%3D%221%22%3E%3CmxGeometry%20x%3D%221260%22%20y%3D%22930%22%20width%3D%2231%22%20height%3D%2230.53%22%20as%3D%22geometry%22%2F%3E%3C%2FmxCell%3E%3C%2Froot%3E%3C%2FmxGraphModel%3E

Step01 - create aks cluster and connect thru bastion host 
Step02 -
setup ingress and create static public IP
Step03 - 
Install Ingress Controller using helm
Step04 - Create an ingress route 


Step-01  Create an AKS Cluster from Bastion Host.

Pre-requisite 
 - Verify you have the Microsoft.OperationsManagement and Microsoft.OperationalInsights providers registered on your subscription.
    (These Azure resource providers are required to support Container insights)
 - 
A resource group under which AKS cluster will be deployed.
 - Enable addon http_application_routing in case you do not have https enabled


 $ az provider show -n Microsoft.OperationsManagement -o table
$ az provider show -n Microsoft.OperationalInsights -o table

  Enable http_application_routing
 $ az aks enable-addons --resource-group test-networking-uksouth \
   --name aks-cluster --addons http_application_routing 

 $ az provider show -n Microsoft.ContainerService -o table


Presuming you have a resource group in place, proceed to create an AKS cluster now -


 $ az aks create -g test-networking-uksouth -n aks-cluster \
   --enable-managed-identity \
   --node-count 1 \
   --enable-addons monitoring \
   --enable-msi-auth-for-monitoring \
   --generate-ssh-keys


Next connect to AKS Cluster from Bastion Host -


 $ az login

 set the cluster subscription
 $ az account set --subscription bf687f81-fad1-48cb-b38c-b6e9b00a5cfe

 download cluster credentials
 $ az aks get-credentials --resource-group test-networking-uksouth --name aks-cluster

 install Kubectl
 $ curl -LO https://storage.googleapis.com/kubernetes-release/release/v1.23.6/bin/linux/amd64/kubectl
 $ chmod +x kubectl && mv kubectl /usr/bin/
 $ kubectl cluster-info

Setup Ingress 

Step-02 Create a static public IP -


 Get the resource group name of the AKS cluster that you need to update in subsequent comamnd 
 $ az aks show --resource-group test-networking-uksouth --name aks-cluster --query nodeResourceGroup -o tsv

 Create a public IP address with the static allocation &
 ASSOCIATE - Assign this Public IP to a Load Balancer & replace them
$ az network public-ip create \ --resource-group MC_test-networking-uksouth_aks-cluster_uksouth \ --name myAKSPublicIPForIngress \ --sku Standard \ --allocation-method static \ --query publicIp.ipAddress -o tsv  ex- o/p - 51.104.208.183
Step-03: Install Ingress Controller using helm


 Install Helm3 (if not installed)

 $ wget https://get.helm.sh/helm-v3.10.3-linux-amd64.tar.gz 
 $ tar -zxvf helm-v3.0.0-linux-amd64.tar.gz
 $ sudo cp -rp linux-amd64/helm /usr/local/bin/

 Create a namespace for your ingress resources
 $ kubectl create namespace ingress-basic

 Add the official stable repository
 $ helm repo add ingress-nginx https://kubernetes.github.io/ingress-nginx
 $ helm repo add stable https://charts.helm.sh/stable
 $ helm repo update

 Customizing the Chart Before Installing.
 $ helm show values ingress-nginx/ingress-nginx

 Use Helm to deploy an NGINX ingress controller & Replace with your static IP
 $ helm install ingress-nginx ingress-nginx/ingress-nginx \
   --namespace ingress-basic \
   --set controller.image.allowPrivilegeEscalation=false \
   --set controller.replicaCount=2 \
   --set controller.nodeSelector."beta\.kubernetes\.io/os"=linux \
   --set defaultBackend.nodeSelector."kubernetes.io/os"=linux \
   --set controller.service.externalTrafficPolicy=Local \
   --set controller.service.loadBalancerIP="51.104.208.183" 

 ex - o/p -
 NOTES:
 The ingress-nginx controller has been installed.
 It may take a few minutes for the LoadBalancer IP to be available.
 You can watch the status by running 
 'kubectl --namespace ingress-basic get services -o wide -w ingress-nginx-controller'

List services with labels


 $ kubectl get service -l app.kubernetes.io/name=ingress-nginx --namespace ingress-basic

 List Pods
 $ kubectl get pods -n ingress-basic
 $ kubectl get all -n ingress-basic


Access Public IP like - http://<Public-IP-created-for-Ingress>
ex - http://51.104.208.183/ 

Output should be -    404 Not Found from Nginx
ex -


Verify Load Balancer on Azure Mgmt Console

    Primarily refer Settings -> Frontend IP Configuration


Setup DNS

First go to your public IP address & configure it | DNS record first to associate with your public IP address
- create DNS zone - sampleapp.com in your resource-group
- create alias record - my.sampleapp.com
- add DNS name label - sampleapp1 which will become DNS

the DNS will look like - http://sampleapp1.uksouth.cloudapp.azure.com/


Step04 - create an ingress route

# INGRESS RESOURCE THAT WILL BE DEPLOYED AS APP LOAD-BALANCER IN AKS ---
apiVersion: networking.k8s.io/v1
kind: Ingress
metadata:
  namespace: ingress-basic
  name: sampleapp-ing
  annotations:
kubernetes.io/ingress.class: nginx
kubernetes.io/ingress.class: addon-http-application-routing
    nginx.ingress.kubernetes.io/ssl-redirect: "false"
nginx.ingress.kubernetes.io/rewrite-target: /static/$2
spec:
  ingressClassName: alb
  rules:
# - host: sampleapp1.uksouth.cloudapp.azure.com // <DNSentryofPublicIP>
    - http:
        paths:
        - path: /
          pathType: Prefix
          backend:
            service:
              name: sampleapp-svc
              port:
                number: 80

Test ingress by deploying a sample application


 $ kubectl create deployment sampleapp --image=punitporwal07/sampleapp:3.0 -n ingress-basic


Known issues -


Issue1 -
on running kubectl get pods -n ingress-basic you might observer that the ingress deployment fails to schedule pods and see following errors in the namespace events.

Error creating: admission webhook "validation.gatekeeper.sh" denied the request:
 [azurepolicy-k8sazurev3noprivilegeescalatio-b740f48149d00f4a06d8] Privilege escalation container is not allowed: controller


Solution1 -
This is due to the fact that when we create privileged pods if there is a azure policy attached, it will block the container creation.

Dashboard > cluster > Policies > look for below policy, if present install controller with following tag -


 --set controller.image.allowPrivilegeEscalation=false


22 August 2023

Deploy ArgoCD in k8s

ArgoCD is a declarative, GitOps-driven continuous delivery tool designed specifically for Kubernetes.
Unlike traditional tools, ArgoCD uses Git repositories to hold the precise definition of your application's desired state, making it your single source of trust.

𝗪𝗵𝗮𝘁 𝗠𝗮𝗸𝗲𝘀 𝗔𝗿𝗴𝗼𝗖𝗗 𝗦𝗽𝗲𝗰𝗶𝗮𝗹?

𝗔𝘂𝘁𝗼𝗺𝗮𝘁𝗲𝗱 𝗗𝗲𝗽𝗹𝗼𝘆𝗺𝗲𝗻𝘁𝘀:ArgoCD can automatically deploy your applications to your cluster, be it through a Git commit, a CI/CD pipeline trigger, or even a manual request. Think of the time and effort you'll save!

𝗜𝗻𝘀𝘁𝗮𝗻𝘁 𝗢𝗯𝘀𝗲𝗿𝘃𝗮𝗯𝗶𝗹𝗶𝘁𝘆: With its GUI and CLI, ArgoCD lets developers instantly check whether the application's live state aligns with the desired state. It’s like having a crystal ball for your deployments.

Powerful Operations: It's not just about top-level resources. ArgoCD's UI provides a detailed view of the entire application resource hierarchy, including the underlying ReplicaSets and Pods. Want to see Pod logs and Kubernetes events? It’s all there in a multi-cluster dashboard.

𝗪𝗵𝘆 𝗔𝗿𝗴𝗼𝗖𝗗?

ArgoCD is more than just a tool, it's a strategy in the chaotic world of DevOps. It helps:

✅ Bring order to the chaos
✅ Reach your DevOps milestones
✅ Save precious time and energy for your team

𝗕𝗲 𝘁𝗵𝗲 𝗩𝗶𝗰𝘁𝗼𝗿 𝗶𝗻 𝗬𝗼𝘂𝗿 𝗗𝗲𝘃𝗢𝗽𝘀 𝗕𝗮𝘁𝘁𝗹𝗲

If your DevOps environment feels overwhelming, ArgoCD might be the tool you've been searching for. It's designed to tame the chaos, streamline operations, and position you as a victor in the ever-challenging DevOps landscape.

Setup ArgoCD in your kubernetes cluster

if you have a cluster not up and running already follow the article here to set up one - 

https://cloudnetes.blogspot.com/2018/02/launching-kubernetes-cluster-different.html
Launch k8s-cluster


 Create argocd namespace in your cluster
 $ kubectl create namespace argocd


 Run the Argo CD install script provided by the project maintainers
 $ kubectl apply -n argocd -f https://raw.githubusercontent.com/argoproj/argo-cd/stable/manifests/install.yaml


 Verify the argocd pods and resources
 $ kubectl get all -n argocd
 $ watch kubectl get pods -n argocd


there are different articles on the internet that will misguide you in doing port forwarding to access the argocd dashboard which I am not sure how that will work, instead should try following the basic method -

 
 expose your argocd-server deployment as NP or LB type to access Argo CD
 $ kubectl expose deploy/argocd-server --type=NodePort --name=arg-svc
 $ kubectl expose deploy/argocd-server --type=LoadBalancer --name=argcd-svc

 Alternatively if you are deploying it to a cloud k8s service, use -
 $ kubectl patch svc argocd-server -n argocd -p '{"spec": {"type": "LoadBalancer"}}'

 Fetch the LoadBalancer DNS
 $ export ARGOCD_SERVER=`kubectl get svc argocd-server -n argocd -o json \
   | jq --raw-output '.status.loadBalancer.ingress[0].hostname'`
 $ echo $ARGOCD_SERVER


access the argocd deployment by hitting the public IP and port of your exposed service that you created in the command above


 Fetch the passwd of argocd from secrets
 $ kubectl get secret argocd-initial-admin-secret -o yaml
 $ echo "Q20yMGV0DeMo05WZ0otZg==" | base64 -d
 Cm20eDeMoSNVgJ-f
 
 OR

 $ kubectl -n argocd get secret argocd-initial-admin-secret -o jsonpath="{.data.password}" | base64 -d; echo


Forgot your argocd password after you have changed it, patch the secret.

To reset password you might remove ‘admin.password’ and ‘admin.passwordMtime’ keys from argocd-secret and restart api server pod. Password will be reset to pod name.


 $ kubectl patch secret argocd-secret  -p '{"data": {"admin.password": null, "admin.passwordMtime": null}}' -n argocd
 $ kubectl delete pod/argocd-server-756bbc65c5-zttw4 -n argocd
 
 fetch new pass again -
 $ kubectl -n argocd get secret argocd-initial-admin-secret -o jsonpath="{.data.password}" | base64 -d; echo


Once you are in do the following -
✅ connect repositories
✅ create application
✅ Sync up your deployment

ex- thats how your apps will be shown once added to argocd


21 July 2023

AWS secrets scanning

Were you aware? With GitHub's secret scanning, we are able to add an additional layer of security to our repositories.

When we make our repositories public or make changes to public repositories, GitHub's advanced secret scanning feature is triggered.
The program meticulously searches the code looking for any secrets that match predefined partner patterns.

When a potential secret is detected, the investigation does not end there! As a result, GitHub notifies the service provider responsible for the secret issuance. This could be a third-party service like AWS. The provider then assesses the situation and decides whether to revoke the secret, issue a new one, or reach out directly to us. Their response depends on the level of risk involved for all parties.

Within minutes you will get an email from AWS about the breach and your access key would have a quarantine policy attached to it. 

👉 Key takeaway: It is important to note that, while AWS is a key component of our technology stack, it is not the one that scans GitHub repositories for secrets. It is GitHub's secret scanning feature that protects us against inadvertent disclosures.

Furthermore, due to this feature of GitHub aws detects any exposed/compromised keys online, and will attach the "AWSCompromisedKeyQuarantineV2" AWS Managed Policy ("Quarantine Policy") to the IAM User of which keys are exposed, and trigger a mail notification to your registered account with the details. So every time you try to use any resources from the exposed key you will get an authorization error.  

ex: 
 
 FAILED! => {"changed": false, "msg": "Instance creation failed => UnauthorizedOperation:
 You are not authorized to perform this operation. Encoded authorization failure message: 
 mw4pJJXTCly9BRXiEEzZhmPvanjwTNMCJ0MRAsFGw-jSRJyUwRz9tgdKjQF_S_d3IspWq_d4-LL1
 

The "UnauthorizedOperation" error indicates that permissions attached to the AWS IAM role or user trying to perform the operation does not have the required permissions to launch EC2 instances. Because the error involves an encoded message, use the aws-cli to decode the message. 

 
 Encoded-message is the encrypted value you get in your error msg
 $ aws sts decode-authorization-message --encoded-message encoded-message


--

28 January 2023

Enable container insight for EKS-Fargate in cloudwatch

In this article, we will demonstrate on how to implement Container 
Insights metrics using an (AWS Distro for OpenTelemetry) ADOT collector on an EKS Fargate cluster to visualize your cluster & container data at every layer of the performance stack in Amazon Cloudwatch. Presuming you have an EKS-Cluster with a fargate profile already up and running, if not follow the article to setup one. then it involves only the following things to achieve it -

- adot IAM service account
- adot-collector
- fargate profile for adot-collector

Create adot iamserviceaccount 


eksctl create iamserviceaccount \
--cluster btcluster \
--region eu-west-2 \
--namespace fargate-container-insights \
--name adot-collector \
--attach-policy-arn arn:aws:iam::aws:policy/CloudWatchAgentServerPolicy \
--override-existing-serviceaccounts \
--approve


in-case of deleting iamserviceacount


eksctl delete iamserviceaccount --cluster btcluster --name adot-collector -n fargate-container-insights

Deploy Adot-collector


wget https://github.com/punitporwal07/kubernetes/blob/master/monitoring/cloudwatch-insight/eks-fargate-container-insights.yaml

kubectl apply -f eks-fargate-container-insights.yaml


Create compute fargate profile for the adot-collector pod that comes with statefulset


eksctl create fargateprofile --name adot-collector --cluster btcluster -n fargate-container-insights 


Navigate to AWS cloudwatch

services > cloudWatch > logs > log groups & search for insight 


services > cloudWatch > insights > Container insights > resources


services > cloudWatch > insights > Container insights > container map


Some helpful commands

to scale down statefulset -

kubectl -n fargate-container-insights patch statefulset.apps/adot-collector -p '{"spec": {"template": {"spec": {"nodeSelector": {"non-existing": "true"}}}}}'

to scale up statefulset -


kubectl -n fargate-container-insights patch statefulset.apps/adot-collector --type json -p='[{"op": "remove", "path": "/spec/template/spec/nodeSelector/non-existing"}]'


ref - https://aws.amazon.com/premiumsupport/knowledge-center/cloudwatch-container-insights-eks-fargate/

21 January 2023

PostgreSQL cheatsheet (advance)

cstore_fdw - Columnar store for analytics with PostgreSQL.

cyanaudit - Cyan Audit provides in-database logging of all DML activity on a column-by-column basis.

pg_cron - Run periodic jobs in PostgreSQL.

pglogical - Extension that provides logical streaming replication.

pg_partman - Partition management extension for PostgreSQL.

pg_paxos - Basic implementation of Paxos and Paxos-based table replication for a cluster of PostgreSQL nodes.

pg_shard - Extension to scale out real-time reads and writes.

PGStrom - Extension to offload CPU-intensive workloads to GPU.

pgxn PostgreSQL Extension Network - central distribution point for many open-source PostgreSQL extensions

PipelineDB - A PostgreSQL extension that runs SQL queries continuously on streams, incrementally storing results in tables.

plpgsql_check - Extension that allows to check plpgsql source code.

PostGIS - Spatial and Geographic objects for PostgreSQL.

PG_Themis - Postgres binding as an extension for crypto library Themis, providing various security services on PgSQL's side.

zomboDB - Extension that enables efficient full-text searching via the use of indexes backed by Elasticsearch.

pgMemento - Provides an audit trail for your data inside a PostgreSQL database using triggers and server-side functions written in PL/pgSQL.

timescaleDB - Open-source time-series database fully compatible with Postgres, distributed as an extension

pgTAP - Database testing framework for Postgres