08 November 2022

Terraform module

What is Terraform module & how to create one

A Terraform module is a collection of reusable Terraform configurations that represents a set of resources or infrastructure components that can be managed together as a single unit.

Terraform modules typically consist of:

Input Variables: Parameters that allow users of the module to provide specific values when they use the module. They serve as a way to customize the behavior of the module for different use cases.
Resource Definitions: A module defines the resources it creates or manages, allowing you to encapsulate complex infrastructure configurations into reusable components.
Output Variables: Output variables are used to expose specific information about the resources created by the module.
Local Values (Optional): Local values are used to define intermediate values or calculations within the module's configuration.
Data Sources (Optional): Data sources enable you to retrieve information about existing resources or data from external sources.
Provisioners (Optional): Provisioners are used to execute scripts or commands on resources after they are created or updated. While they can be used within a module, it is generally recommended to avoid using provisioners unless there is no other alternative.
Submodules (Optional): A Terraform module can also include other submodules, allowing for modular composition and reuse. Submodules are nested modules within the main module, which can be used to create a more granular and flexible component structure.

To create a Terraform module, follow these steps:

Step 1: Create a Directory
Create a new directory that will contain your module. Give it a meaningful name that represents the functionality of the module.

Step 2: Write Configuration Files
Inside the module directory, create one or more Terraform configuration files with the .tf extension. These files will define the resources and configurations that the module provides. The configuration files should include input variables, resource definitions, and output variables.

Step 3: Define Input Variables
Declare input variables in the module configuration files to allow users of the module to provide values specific to their use case. Use the declared input variables within the resource definitions and other parts of the module's configuration to make it configurable.

Step 4: Define Output Variables
Declare output variables to expose specific information about the created resources or any other relevant data.

Step 5: Publish the Module
To share the module with others, you can publish it to Terraform Registry (public or private) or a version control repository accessible to others.

Create a simple example of a Terraform module for an EC2 instance:

Directory structure for the module:

$ mkdir -p modules/aws-ec2-instance
$ cd modules/aws-ec2-instance/
$ touch main.tf variables.tf outputs.tf
$ cd ..
$ tree
.
└── aws-ec2-instance
    ├── main.tf
    ├── outputs.tf
    └── variables.tf

1 directory, 3 files

Now, let's define the contents of each file:

main.tf

resource "aws_instance" "example_instance" {
  ami           = var.ami
  instance_type = var.instance_type
  subnet_id     = var.subnet_id
  security_groups = [var.security_group_id]
}

variables.tf

variable "ami" {
  description = "The ID of the AMI to use for the EC2 instance."
}

variable "instance_type" {
  description = "The type of EC2 instance to create."
}

variable "subnet_id" {
  description = "The ID of the subnet where the EC2 instance will be launched."
}

variable "security_group_id" {
  description = "The ID of the security group to attach to the EC2 instance."
}

outputs.tf

output "instance_id" {
  description = "The ID of the created EC2 instance."
  value       = aws_instance.example_instance.id
}

output "public_ip" {
  description = "The public IP address of the EC2 instance."
  value       = aws_instance.example_instance.public_ip
}

With this module, you can create an EC2 instance by calling it in your root Terraform configuration:

provider "aws" {
  region = "us-west-2"
}

module "ec2_instance" {
  source = "./path/to/module"  # Local path to the module directory

  ami                = "ami-0c55b159cbfafe1f0"
  instance_type      = "t2.micro"
  subnet_id          = "subnet-0123456789abcdef0"
  security_group_id  = "sg-0123456789abcdef0"
}

output "module_instance_id" {
  value = module.ec2_instance.instance_id
}

output "module_public_ip" {
  value = module.ec2_instance.public_ip
}

You can store Terraform modules in various locations, depending on your use case and organizational preferences. Here are some common options for storing modules:

  • Local paths
  • Terraform Registry
  • Git Repositories

Local paths

You can store modules directly in your Terraform project's directory structure, or in a subdirectory.
A local path must begin with either ./ or ../ to indicate that a local path.

module "instance" {
  source = "../modules/aws-ec2-instance"
}

Terraform Registry
The Terraform Registry is a public repository maintained by HashiCorp that contains many officially supported and community-contributed modules. You can publish your modules to the Terraform Registry or use existing modules directly from it.
You can also use a private registry, either via the built-in feature from Terraform Cloud or Terraform Enterprise.
Terraform Registry can be referenced using a registry source address of the form
 < NAMESPACE >/< NAME >/< PROVIDER > or 
terraform-<PROVIDER>-<NAME>

module "instance" {
  source = "hashicorp/ec2-instance/aws"
  version = "0.1.0"
}

Git Repositories
(https://github.com/punitporwal07/terraform-aws-ec2) 

For larger projects or when you want to share modules across multiple projects or teams, you can store modules in separate Git repositories.
Each module will have its own repository, and you can refer to it using a Git URL.

Publishing a module on Git Repository
 refer -  https://developer.hashicorp.com/terraform/registry/modules/publish 
once module files are available in github, publish it from - https://registry.terraform.io/ 

calling module in your code
module "ec2" {
  source = "punitporwal07/terraform-aws-ec2"
  version = "1.0.0" # git tag
}

or
module "ec2" {
  source = "git@github.com:aws-modules/terraform-aws-ec2.git"
  version = "1.0.0" # git tag
}
once published can be seen as below -


13 January 2021

Terraform Cheatsheet

To implement infrastructure as code with different cloud providers, terraform comes with commands that take subcommands such as "apply" or "plan" to do its job. Below is the complete list of subcommands

Terraform workspaces in more detail -
Terraform workspaces are a feature that allows you to manage multiple distinct sets of Terraform state files within a single Terraform configuration.

Workspaces are useful when you need to maintain multiple copies of the same infrastructure for different purposes, such as development, testing, staging, and production, without duplicating your configuration files.

When you work with Terraform workspaces, each workspace has its own state file, which means that you can have different resource instances or configurations for each workspace.

This separation helps prevent accidental changes to the wrong environments and makes it easier to manage complex deployments.

Terraform starts with a single, default workspace named `default` that you cannot delete. If you have not created a new workspace, you are using the default workspace in your Terraform working directory.

Few commands to work on workspaces -

List workspaces:
$ terraform workspace list  
 * default
Create a workspace:
$ terraform workspace new dev
 Created and switched to workspace "dev"!
You're now on a new, empty workspace. Workspaces isolate their state,
so if you run "terraform plan" Terraform will not see any existing state
for this configuration.

$ terraform workspace new staging
 Created and switched to workspace "staging"!

You're now on a new, empty workspace. Workspaces isolate their state,
so if you run "terraform plan" Terraform will not see any existing state
for this configuration.
To check the current workspace, use the `terraform workspace show` command.

$ terraform workspace show
staging
Select a Workspace:
To switch b/w workspaces

$ terraform workspace list
  default
  dev
* staging 

$ terraform workspace select dev
 Switched to workspace "dev".

$ terraform workspace show
 dev

Destroy Resources per workspace:
$ terraform workspace delete dev


30 April 2020

Deploying IaC using Terraform

TERRAFORM is used to automate infrastructure deployment across multiple providers in both public and private clouds & even on-prem. Provisioning of infrastructure through 'software' to achieve 'consistent' and 'predictable' environments is Infrastructure as code, it maintains a copy of the Local/Remote state.

                In my view IaC is replacement of SOPs which is automated on top of it.

core concepts to achieve this:
  • Defined in Code: Iac should be defined in code whether in the form of JSON YAML or HCL.
  • Stored in source control: the code should be stored somewhere in the version source control repository like GitHub.
  • Declarative & Imperative: In imperative, I am going to tell the software each and everything which it needs to do the job. In declarative software already have some sort of Idea or a predefined routine, what it is going to do with taking some references. so terraform is an example of a declarative approach to deploy IaC
  • Idempotent & consistency: once a job is done, and if again I get a request to do the same job it is idempotent behavior of terraform to not repeat the steps done while fulfilling this job, instead will say there is no change in configuration and current requirement is same as the desired one so no changes needs to be made. otherwise in a non-idempotent world each time this job comes it gonna repeat the same steps again and again to fulfil the requirement which is already in place.
  • Push & pull: terraform works on the principle of push mechanism where it pushes the configuration to its target.
The key benefit here is - everything is documented in code, which makes you understand your infrastructure in more detail.
key terraform components
AWS-Terraform beyond the basics - Terraform-beyond-the-basics-with-aws

In this exercise, I am trying to demonstrate how you can quickly deploy a t2.micro instance of amazon Linux without login into the aws console by just writing a terraform plan
to begin with, you need to fulfill a prerequisite:
  • terraform client to run terraform commands                              
  • IAM user with AWS CLI access & sufficient policies attached to it
    like  -  AmazonEC2FullAccess
            -  
      IAMFullAccess
Note: at the time of writing this article I have used terraform version 0.8.5 so you may see some resource deprecation.

Install terraform client
$ wget https://releases.hashicorp.com/terraform/0.13.4/terraform_0.13.4_linux_amd64.zip
$ unzip terraform_0.13.4_linux_amd64.zip //updated version $ sudo mv terraform /usr/sbin/

To create a terraform config file with .tf as an extension, here are the key blocks that terraform tends to use to define IaC

#PROVIDER - AWS, google, kuberbetes like providers can be declared here            - on-premsise [OpenStack, VMWare vSphere, CloudStack]
#VARIABLES - input variables can be declared here
#DATA - data from provider collected here in form of data source
#RESOURCE - feeding info about resources from provider here
#OUTPUT - data is outputted when apply is called


Defining variables in terraform can be achieved in multiple ways, you can either create an external file with *.tfvars extension or can create a variables.tf or can include it in your main.tf file to persist variable values.

In this exercise, I will attempt to deploy a "t2.micro" instance on Amazon EC with Nginx up and running.
in the end, your terraform configuration files structure may look like where *.tfplan & *.tfstate are the key files for your IaC.

Creating a terraform configuration file will include following blocks

#VARIABLES

First, we are going to define a set of variables here, that are used during the configuration. I have defined keypairs so that we can SSH to our AWS instance, with a default region where my instance will be deployed

# VARIABLES
variable "prefix" {
  description = "servername prefix"
  default     = "ec2-by-tf"
}


#PROVIDER

In the provider file we are defining our providers, and feeding information about our key details defined in our variable section with syntax var.variableName

# PROVIDER
provider "aws" {
  region  = "eu-west-2"
  profile = "dev"
}


#DATA

In the datasource block, we are pulling data from the provider, in this exercise we are using amazon as a provider and using Linux AMI for our EC2 instance
# DATA
data "aws_ami" "aws-linux" {
most_recent = true owners = ["amazon"] filter { name = "name" values = ["amzn-ami-hvm*"] } filter { name = "root-device-type" values = ["ebs"] } filter { name = "virtualization-type" values = ["hvm"] } }

#RESOURCE

In this block we can define more than one resource, But, here I am using my existing Security Group, keyPair & subnet. 

#RESOURCE
resource "aws_instance" "web" { ami = "ami-078a289ddf4b09ae0" instance_type = "t2.micro" count = 1 vpc_security_group_ids = ["sg-0239c396271cffcc3"] key_name = "my-london-kp" subnet_id = "subnet-00b9ff577be292c27" associate_public_ip_address = "true" tags = { Name = "${var.prefix}${count.index}" } }


#OUTPUT

this block will help to give you the output of your configuration, here it will give Public IP & EC2 Instance ID

#OUTPUT
output "instance_ip" { value = "${aws_instance.web.*.public_ip}" description = "PublicIP address details" } output "instance_id" { value = "${aws_instance.web.*.id}" description = "ID of EC2 Instance" }

#END


Update the value for the following as per your requirement -
AMI ID
KeyPair
Security Group ID
Subnet ID

now to deploy the above configuration, terraform deployment process follows a cycle:

Initialization > Planning > Application > destruction


$ terraform init


this initializes the terraform configuration and checks for provider modules/plugins if its already not available and downloads the modules as shown below


$ terraform fmt // this will check the formatting of all the config files
$ terraform validate // this will further validate your config
$ terraform plan -out ami.tfplan // outing the plan will help to reuse it


it looks for the configuration file in pwd and loads all variables if found in the variable file, and stores out the plan as shown below


$ terraform apply "ami.tfplan" --auto-approve


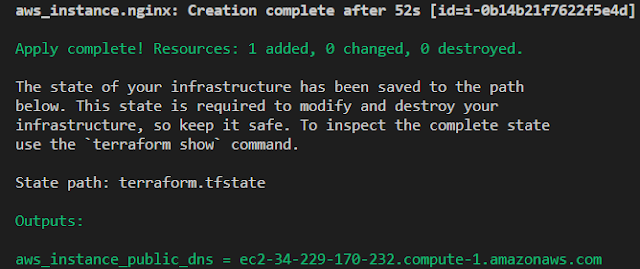
it performs the configuration you created as code, applies it to the provider and does the magic. At the time of applying tfplan if anything config your terraform doesn't like and gives you an error, you need to correct it again and replan the ami.tfplan

Test your configuration by hitting the URL generated by outputs.tf file


Validate from your aws console you will see this


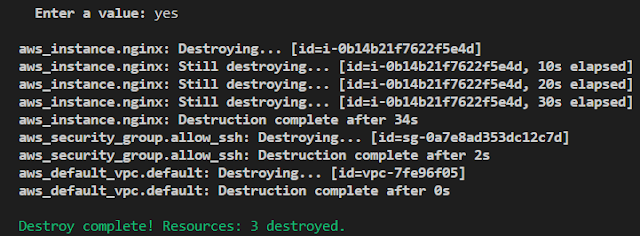
now if you don't want the configs to be active and charge you the money you can destroy it


$ terraform destroy --auto-approve


lastly from your config folder you can destroy the config you applied and it will destroy everything corresponding to your config